A Guide to Hiding Your MAC and IP Addresses
24 Mar 2017
.
tech
.
Comments
#security
#redteam
#tor
Welcome to the start of the #redteam series of posts. In this post, we’ll be using Kali Linux as our setup since it comes equipped with all the necessary tools. You can install Kali either on a VM, or on a USB stick. Install it on a USB stick, will allow you to boot from it in any workstation you may need, while not leaving digital traces behind you.
Our goal in this series is to gain access to resources that we are not
authorized to access. However, the owner of the resource should not be able to
detect that we’ve accessed it. First, we need to hide our MAC address to avoid
being identified by our network provider. Your MAC address is a physical unique
machine identifier that can be logged by your network provider, such as
Starbucks’ WiFi network. To avoid this, we’ll be using macchanger to randomly
change our MAC address. Simply run the following command if you’re using WiFi:
ifconfig wlan0 down
macchanger -r wlan0 # -r for asking for a random MAC
ifconfig wlan0 up
If you’re using Ethernet, replace wlan0 with eth0. You can add these
commands to your bash profile to ensure that you never forget to run them.
Next, we need to hide our IP address. Although your IP address can’t be spoofed, we can use a proxy to redirect our traffic through another server. This will make it difficult for third parties to trace our original IP address.
We can use the proxychains tool to issue any web requestthrough a proxy
easily. Start by finding your IP address using the following command:
curl https://ipv4.icanhazip.com/
# 193.71.106.208
By default, proxychains uses the Tor network as a proxy, so let’s start the
Tor service by running:
service tor start
Then you simply add proxychains before the command that will make web requests
you want to execute. For instance, if you want to perform a network scan, run:
proxychains nmap -sS 192.168.1.0/24
To see your IP address changing, let’s use the following command to GET the canhazip page through proxychains:
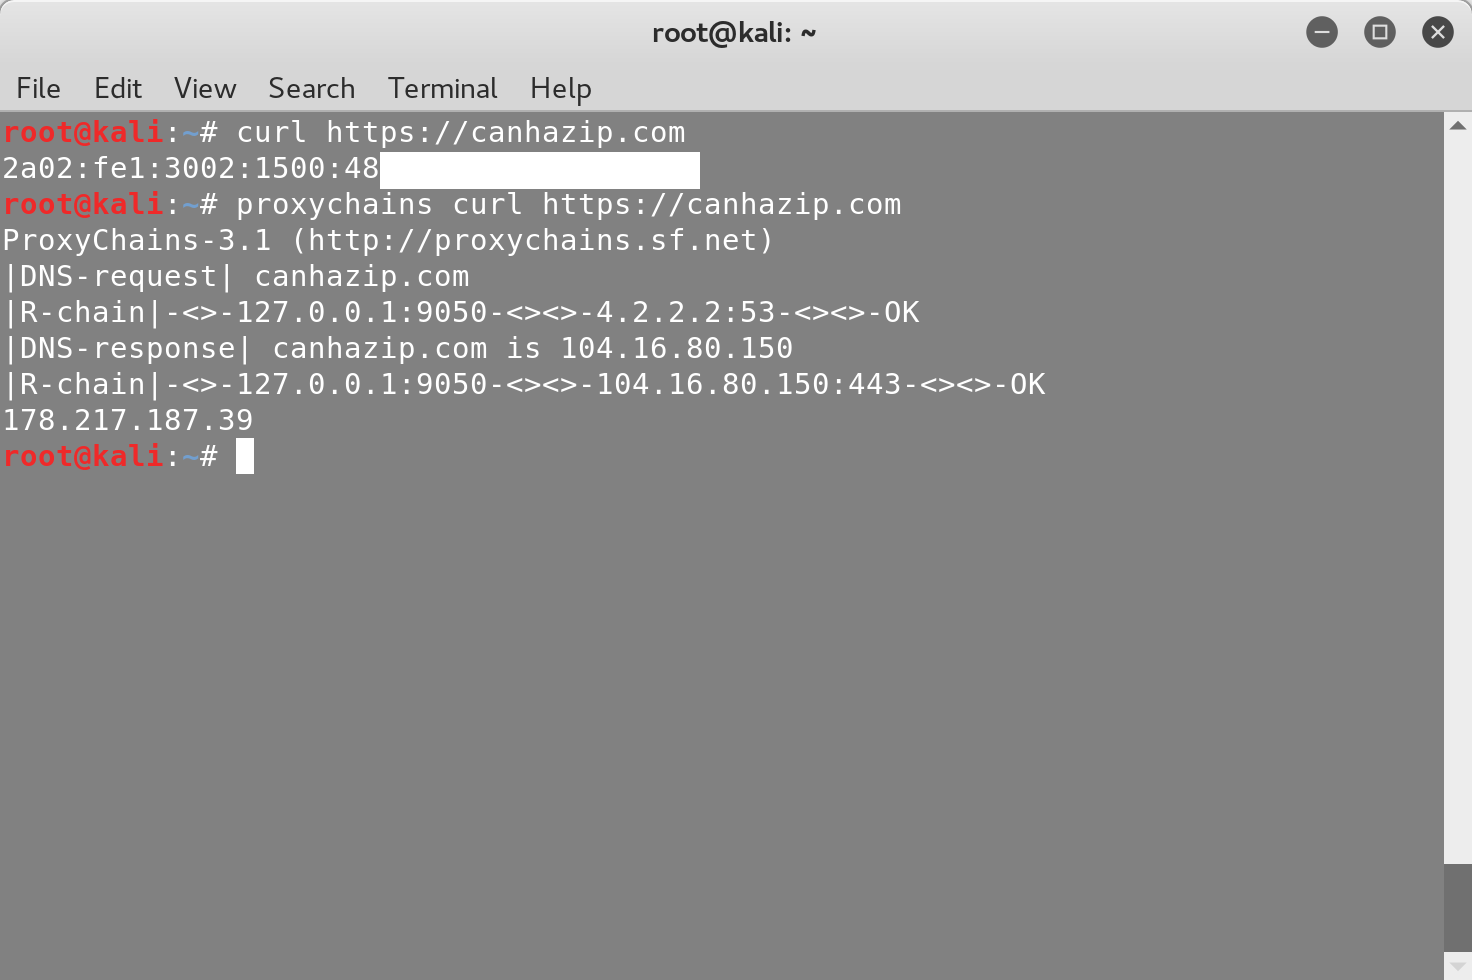
You can verify that your IP is one of Tor’s exit nodes by searching for it here. To chain multiple proxies together, add them to the proxychains configuration file by typing:
nano /etc/proxychains.conf
Here’s an example of how to add a proxy located in Venezuela:
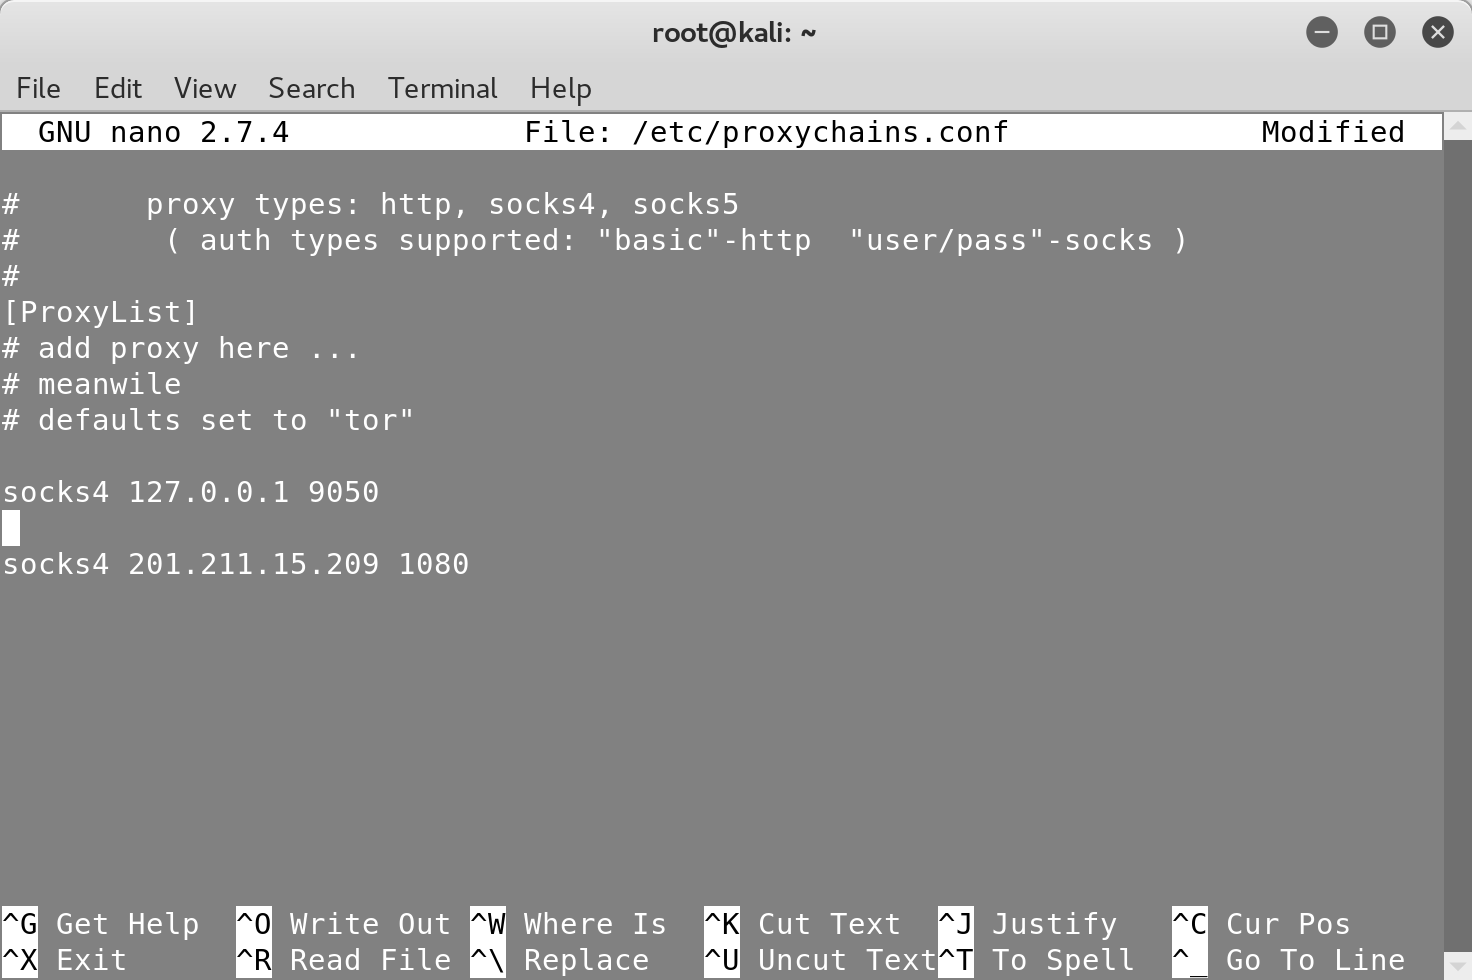
You can chain as many proxies as you want to make it more difficult to trace your original IP address.
Finally, let’s randomize the chain order by commenting out the strict_chain
option and uncommenting the random_chain option:
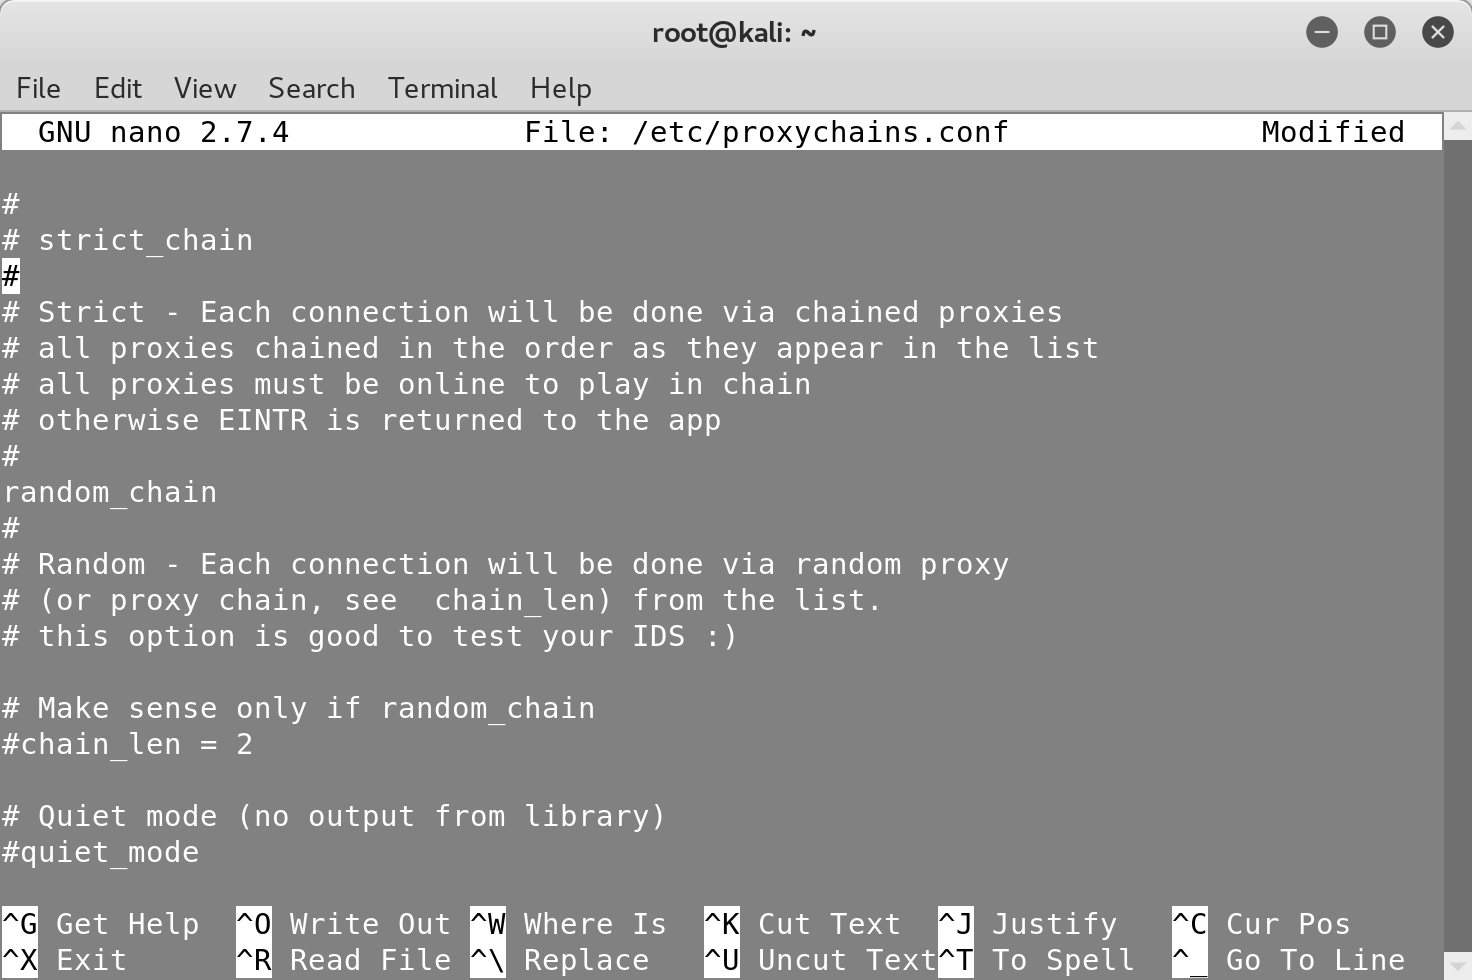
Now, your traffic will go through either the three Tor nodes and then the proxy in Venezuela or vice versa.

A creative thinker who is not afraid to challenge the norm. His diverse track record includes failed startups, approved patents and scientific publications in top conferences and journals. On a mission to protect what matters most to you.